- Published on
Executing ComfyUI Workflows as Standalone Scripts
- Authors

- Name
- Timothy Lin
- @timlrxx

ComfyUI is an open-source graphical user interface for creating and executing complex machine learning workflows. It skyrocketed in popularity alongside the growth of diffusion models by enabling users to design intricate pipelines and experiment with different settings such as text encoding, image generation parameters, and postprocessing. The intuitive drag-and-drop graph-based interface makes ComfyUI a power user tool popular among the developer community.
However, the default setup of ComfyUI relies on a web-based interface and a server backend to execute workflows, with both parts of the code very much intertwined. This makes running ComfyUI workflows in a standalone manner particularly difficult and adds additional setup hassle and execution overhead as developers look to deploy their workflows in more lean applications or as part of a headless processing pipeline.
Recently, I was exploring various solutions to run ComfyUI workflows as standalone scripts, but I could not find any suitable workarounds. The closest alternative was ComfyUI-to-Python-Extension, which converts ComfyUI workflows to Python scripts. However, this still requires an intermediate conversion step that would make dynamic workflows more difficult to execute.
After a couple of hours of tinkering, I pieced together a solution that allows you to run ComfyUI workflows as standalone scripts. Check out the Github Gist for the source code or read on for more implementation details.
Table of Contents
Prerequisites
Refer to the ComfyUI Github page for more information on how to install and run the ComfyUI server. The server makes it easy to create and prototype workflows, and I will also be using it to generate the Workflow API JSON file that we will use to run the workflow as a standalone script.1
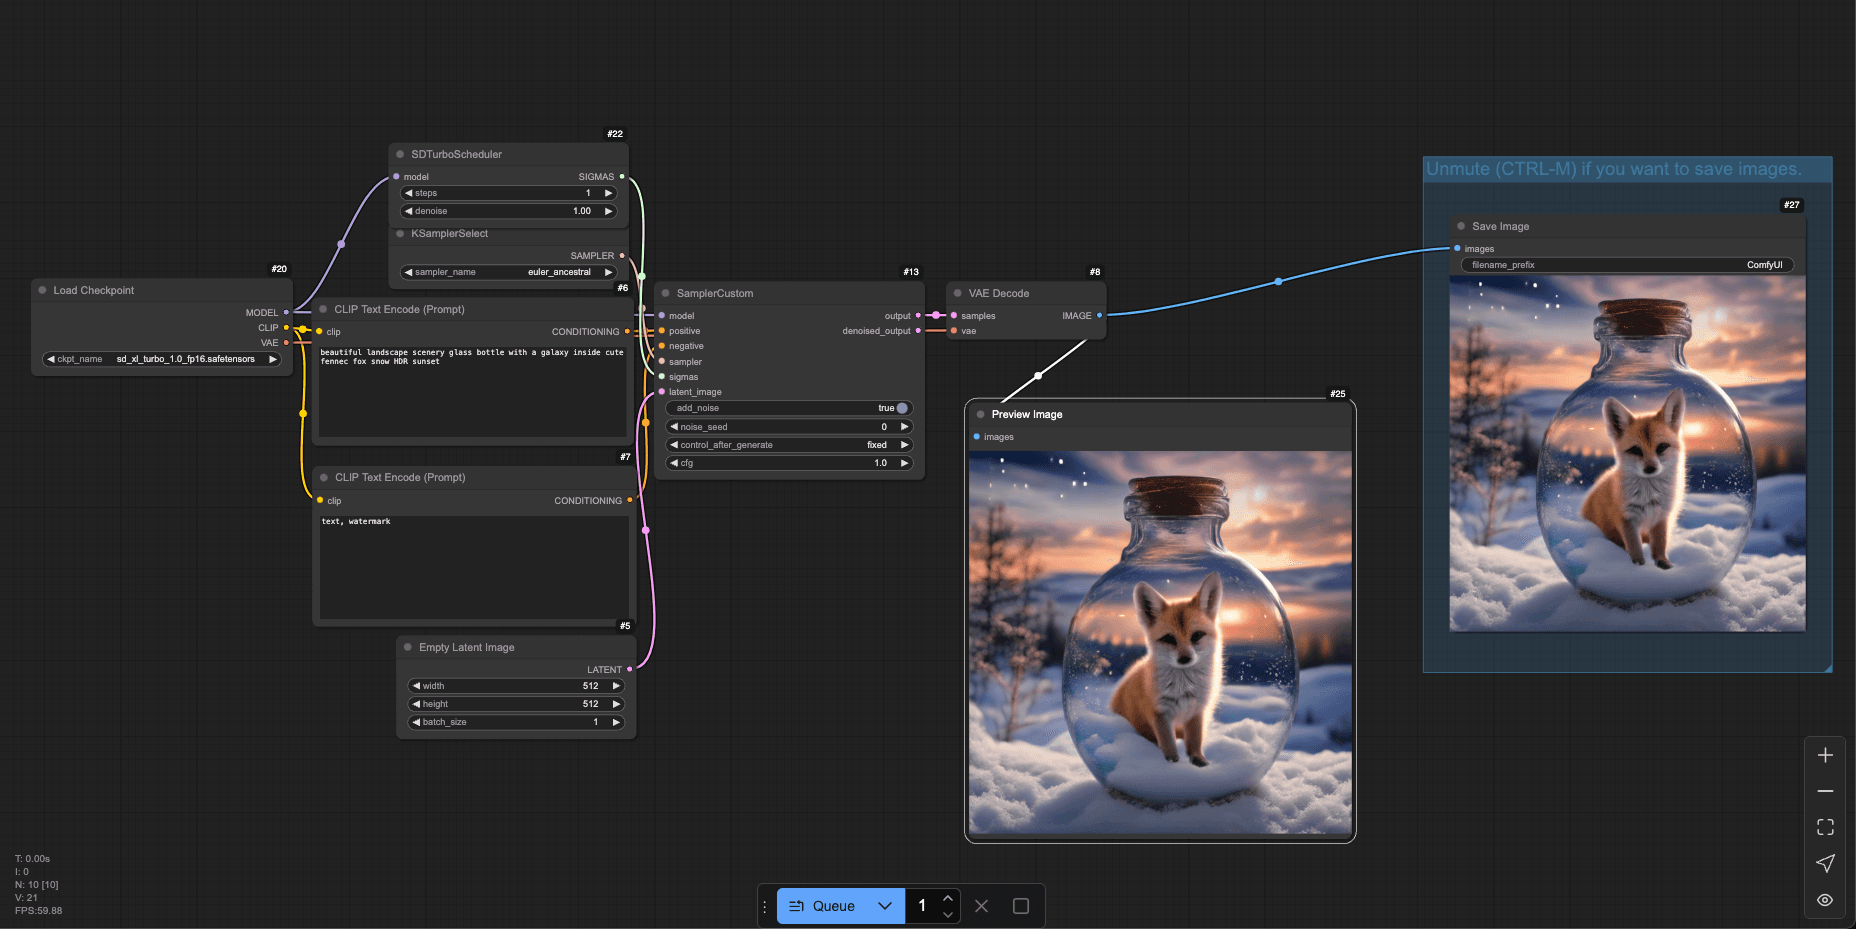
As part of this post, I will also be referencing the SDXL Turbo workflow which you can find over here. If you wish to follow along, you can download the model from the official SDXL Turbo Repository and place it in the models/checkpoints directory.
Understanding the Workflow JSON Format
When working with ComfyUI, it's crucial to understand the different the two different JSON formats used to represent workflows.
Workflow.json (Frontend Format)
This is probably the more widely used and recognised format. It is required to layout the graph editor in ComfyUI frontend user interface for visual representation and editing of workflows.
Key points:
- Contains node positions, links, and visual metadata.
- Each node has a unique visual identifier, often numeric (e.g., "1", "2", "3").
- Links between nodes are represented as explicit connections.
- Follows the Litegraph format, which is designed for graph visualization and manipulation.
Example:
{
  "nodes": [
      {
          "id": 7,
          "type": "CLIPTextEncode",
          "pos": [
              352,
              176
          ],
          "size": [
              425.27801513671875,
              180.6060791015625
          ],
          "flags": {},
          "order": 5,
          "mode": 0,
          "inputs": [
              {
                  "name": "clip",
                  "type": "CLIP",
                  "link": 39
              }
          ],
          "outputs": [
              {
                  "name": "CONDITIONING",
                  "type": "CONDITIONING",
                  "links": [
                      20
                  ],
                  "slot_index": 0
              }
          ],
          "properties": {
              "Node name for S&R": "CLIPTextEncode"
          },
          "widgets_values": [
              "text, watermark"
          ]
      },
      ...
  ],
  "links": [
      [
          18,
          14,
          0,
          13,
          3,
          "SAMPLER"
      ],
      [
          19,
          6,
          0,
          13,
          1,
          "CONDITIONING"
      ],
      ...
  ]
}
Workflow API JSON (Backend Format)

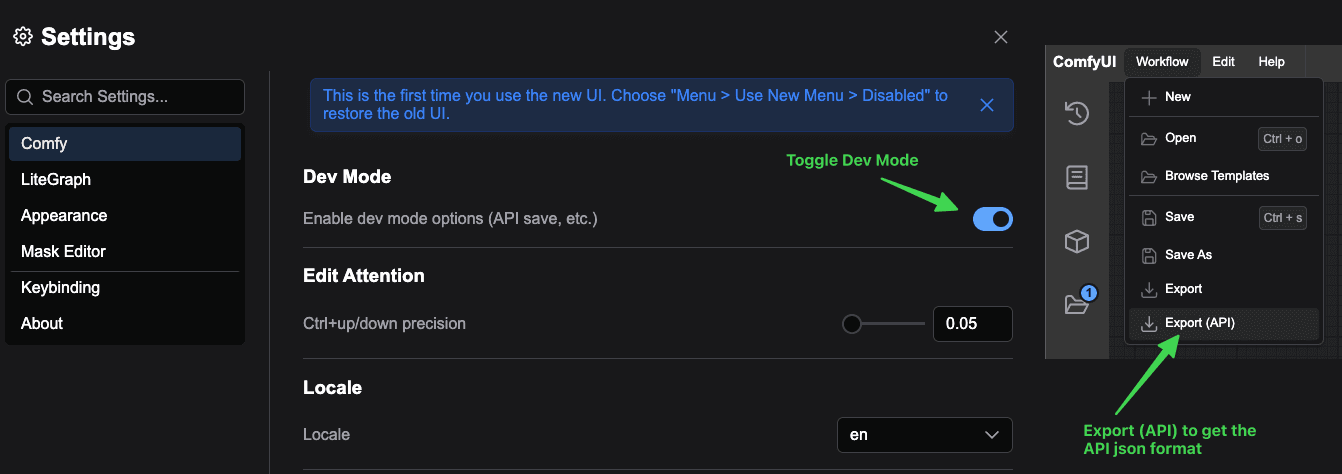
The workflow API JSON can be accessed by switching to dev mode and exporting the workflow as an API JSON. Internally, it is also used in the execution of a workflow.
Key points:
- Provides a more compact representation optimized for execution.
- Eliminates visual/UI-specific metadata such as node positions and sizes.
- Links between nodes are embedded directly within the node inputs.
- Each node is identified by a unique key (e.g., "5", "6", "7").
Example:
{
"7": {
    "inputs": {
      "text": "text, watermark",
      "clip": [
        "20",
        1
      ]
    },
    "class_type": "CLIPTextEncode",
    "_meta": {
      "title": "CLIP Text Encode (Prompt)"
    }
  },
"20": {
    "inputs": {
      "ckpt_name": "sd_xl_turbo_1.0_fp16.safetensors"
    },
    "class_type": "CheckpointLoaderSimple",
    "_meta": {
      "title": "Load Checkpoint"
    }
  },
  ...
}
The workflow API JSON format serves as the foundation for executing workflows programmatically, as it contains all the necessary information about nodes, their inputs, and the connections between them. Take a closer look at the inputs for node "7" of type "CLIPTextEncode" and you will see that the inputs contain properties taken from widgets_values in the original Workflow.json file as well as any associated links. In this example ([20, 1]), the field clip is linked to node "20" and the 2nd input slot.
Creating a Standalone Execution Script
To execute ComfyUI workflows in a standalone environment, we need to create a Python script that encapsulates the necessary components and logic. There are two main components of the script - WorkflowExecutor and ExecutionCache, which form the core of the standalone execution process.
You can find the complete standalone execution script in this GitHub Gist.
WorkflowExecutor
The WorkflowExecutor is responsible for orchestrating the execution of a ComfyUI workflow. It initializes the execution environment, manages caching, and handles node execution. In the execute method, it first validates the workflow JSON, using ComfyUI's validate_prompt function before constructing it as a DynamicPrompt that gets converted to an ExecutionList.
We will then iterate over the ExecutionList and execute each node in the workflow using the _execute_node method. This relies on ComfyUI's get_input_data to retrieve input data for each node and passes it to the get_output_data function which executes the node and returns the output data.2
ExecutionCache
The ExecutionCache class provides unified cache management for workflow execution. It handles caching of node outputs, UI data, and object instances, optimizing performance and reducing redundant computations. Under the hood, it is built on top of ComfyUI's HierarchicalCache and stores information about a node object, output data, and UI data.
Combining the WorkflowExecutor and ExecutionCache classes provides a relatively minimal implementation of the logic required to execute workflows as standalone scripts while maintaining as close compatibility with ComfyUI as possible.
Demo: Executing the SDXL Turbo Workflow

Now that we have a standalone execution script ready, let's walk through the process of converting the SD Turbo workflow into a standalone execution script.
First, we need to convert the SD Turbo workflow to the API format. You can do this from the user interface in dev mode by exporting the workflow as an API JSON from ComfyUI and saving it as sdxl_workflow_api.json.
Next, we will create a Python script that reads the workflow JSON, executes the workflow, and prints the executed nodes. Here is a simple example of how you can execute the SDXL Turbo workflow using the standalone execution script:
workflow_path = "./user/default/workflows/sdxl_workflow_api.json"
with open(workflow_path) as json_data:
    workflow_json = json.load(json_data)
results = execute_workflow(workflow_json)
print("Workflow executed successfully")
print("Executed nodes: %s", results['executed_nodes'])
If all goes well, you should be able to get a picture similar to the one above in the output directory! I hope this guide makes working with ComfyUI workflows a little easier and more pleasant.
Footnotes
While it is also possible to write a script to convert the
Workflow.jsonprogrammatically, there are some challenges in doing so, since a lot of the logic is tied to the ComfyUI frontend. For simplicity, I recommend using the API JSON format. ↩get_output_datareturns the execution result, UI related output and additional information on whether there is a subgraph. ↩